A Hauntingly Sweet Halloween Memory
There’s something about Halloween that brings out the kid in everyone. Maybe it’s the flicker of jack-o’-lanterns glowing on front porches, or the rustle of leaves under your shoes as you walk from house to house, candy bag in hand.
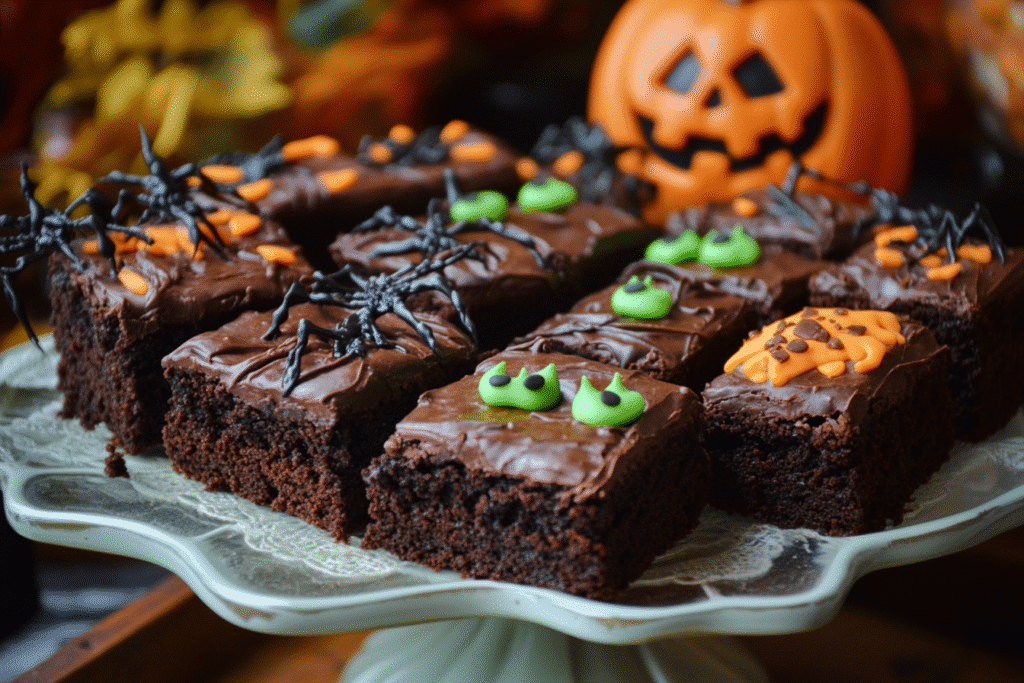
And while the costumes and decorations are fun, let’s be honest — it’s the treats that steal the show. That’s where these Easy Graveyard Brownies come in. They’re the perfect mix of chocolate indulgence and spooky creativity — rich, fudgy brownies transformed into mini edible graveyards.
What makes them even better? You don’t need to be a professional baker or artist to make them look amazing. Whether you’re hosting a Halloween party, baking for your kids’ classroom, or just adding a spooky touch to movie night, this recipe delivers all the fun with none of the stress.
Why You’ll Love These Easy Graveyard Brownies
If Halloween had an edible mascot, it might just be this dessert. These brownies aren’t just delicious — they’re interactive, easy to customize, and practically guaranteed to make everyone smile.
Here’s why they’ll become your new October tradition:
- Quick and easy: You can use a boxed brownie mix or your favorite homemade recipe.
- Fudgy, rich texture: Every bite is pure chocolatey bliss.
- Fun to decorate: Create little edible tombstones, candy ghosts, and chocolate “dirt.”
- Make-ahead friendly: Great for parties or school events.
- Kid-approved: A fun hands-on activity for little ghouls and goblins.
Bonus tip: These brownies double as a Halloween table centerpiece — spooky, sweet, and Instagram-worthy!
Ingredients for Easy Graveyard Brownies
Simple ingredients, spooky results. You probably already have most of these in your kitchen.
Ingredient Table
| Category | Ingredients | Quantity |
|---|---|---|
| Brownie Base | Brownie mix (or homemade brownie batter) | 1 box (18–20 oz) |
| Eggs | 2 large | |
| Vegetable oil | ½ cup | |
| Water | 3 tbsp | |
| Frosting Layer | Chocolate frosting | 1 cup |
| Graveyard Decorations | Chocolate sandwich cookies (Oreos), crushed | 12–15 cookies |
| Milano or rectangular cookies (for tombstones) | 8–10 | |
| Writing gel or icing (black, white, or orange) | As needed | |
| Candy pumpkins | Optional | |
| Gummy worms | Optional | |
| Candy eyeballs or bones | Optional |
Pro Tip: Want extra decadence? Add chocolate chips or drizzle melted chocolate over your brownie batter before baking.
How to Make Easy Graveyard Brownies (Step-by-Step)
These spooky brownies come together in a few easy steps. Don’t worry — no cauldron required.
Step 1: Bake the Brownies
- Preheat your oven according to your brownie mix (usually 350°F or 175°C).
- Prepare the brownie batter by combining your mix, eggs, oil, and water in a large bowl. Stir until smooth.
- Pour the batter into a greased 9×13-inch baking pan and spread evenly.
- Bake for 25–30 minutes, or until a toothpick inserted in the center comes out mostly clean.
- Cool completely before decorating — otherwise your frosting will melt!
Homemade lovers: If you prefer from-scratch brownies, substitute your favorite recipe here. The richer, the better!
Step 2: Create the Chocolate “Dirt” Base
- Once your brownies have cooled, spread a thick layer of chocolate frosting evenly over the top.
- Crush your Oreos in a zip-top bag or food processor until they resemble dirt. A few bigger chunks add realistic texture.
- Sprinkle the crushed cookies generously over the frosting to create your spooky graveyard soil.
Presentation tip: Keep the edges clean so your brownies look like a neatly fenced graveyard scene.
Step 3: Build Your Edible Graveyard
Now the fun begins — decorating!
- Tombstones: Press Milano cookies upright into the brownies. Use gel icing to write “RIP,” “BOO,” or “EEK.”
- Creepy Crawlies: Tuck a few gummy worms peeking out from the “soil.”
- Pumpkin Patch: Place candy pumpkins around the tombstones.
- Bones and Skulls: Add candy bones or white chocolate pieces for a spooky touch.
- Ghosts: Swirl white icing or use mini marshmallows to create ghost shapes.
Kid Tip: Let children decorate their own “plot” — it’s a mess worth making!
Step 4: Slice and Serve
- Chill for 15–20 minutes to help the frosting and decorations set.
- Cut into squares or rectangles, making sure each has at least one tombstone.
- Serve on a platter lined with fake cobwebs or candy corn for extra Halloween magic.
Pro Tip: Add a drizzle of caramel or peanut butter sauce just before serving for a hauntingly good flavor twist.
Creative Decorating Ideas for Your Graveyard Brownies
Want to take your spooky brownies from cute to show-stopping? Try these creative variations.
Classic Designs
- RIP Brownies: The timeless favorite — Milano cookie tombstones, candy pumpkins, and Oreo dirt.
- Wiggly Worm Graveyard: Add gummy worms popping out from beneath the cookie soil.
- Pumpkin Patch: Use candy corn, orange sprinkles, and pumpkin candies for a fall twist.
Advanced Halloween Creations
- Ghost Brownies: Add piped meringue or whipped cream ghosts with candy eyes.
- Spiderweb Effect: Drizzle white icing in spirals and drag a toothpick from the center outward.
- Haunted Forest: Stick chocolate pretzel “trees” upright among your tombstones.
Visual tip: For your blog or Instagram, photograph brownies under dim lighting with a few candles or plastic spiders for an eerie glow.
Make-Ahead and Storage Tips
If you’re planning ahead for a Halloween party or bake sale, these tips will keep your Graveyard Brownies looking and tasting fresh.
- Make Ahead: Bake brownies one day early and store unfrosted. Add decorations on the day of serving.
- Storage: Keep decorated brownies in an airtight container in the fridge for up to 3 days.
- Freezing: Freeze uncut, undecorated brownies for up to 1 month. Thaw before frosting and decorating.
- Party Transport: Use a covered baking dish or tray with parchment paper between layers.
Avoid sogginess: Add gummy worms and candies just before serving to keep them fresh and firm.
Nutritional Information (Per Serving)
| Nutrient | Amount (Approx.) |
|---|---|
| Calories | 310 kcal |
| Carbohydrates | 38 g |
| Fat | 17 g |
| Protein | 3 g |
| Sugar | 25 g |
Note: Values vary based on brand of brownie mix and toppings used.
Expert Tips for Perfect Graveyard Brownies
Creating the perfect Halloween dessert is about balancing fun, flavor, and presentation.
Here’s how you can make yours stand out:
- Cool Completely Before Decorating: Warm brownies will melt frosting and cause sliding decorations.
- Frost Thickly: This helps the “dirt” and tombstones stay in place.
- Add Depth: Use different cookie crumb sizes for texture contrast.
- Use Edible Markers: They make writing on cookies easier than icing for kids.
- Serve at Room Temperature: Fudgy texture tastes best when slightly softened.
Pro Trick: Drizzle a bit of melted dark chocolate across the “dirt” for a moist, realistic look.
Delicious Variations to Try
Variety makes any dessert blog post stronger — and your readers will appreciate it.
Flavor Variations
- Salted Caramel Graveyard Brownies: Add a layer of caramel sauce between brownies and frosting.
- Peanut Butter Lovers: Swirl creamy peanut butter into the batter before baking.
- Mint Chocolate Graveyard: Mix crushed mint Oreos into the topping for a refreshing twist.
- Pumpkin Spice Version: Add pumpkin puree and a dash of cinnamon to the brownie batter.
Theme Variations
- Mini Graveyard Cups: Layer brownies, pudding, and cookies in small cups for single servings.
- White Chocolate Ghost Graveyard: Drizzle melted white chocolate for a ghostly finish.
- Vegan & Allergy-Friendly Version: Use flax eggs, coconut oil, and dairy-free frosting for an inclusive Halloween treat.
Idea: Create a “DIY Brownie Bar” at parties where guests can decorate their own spooky squares.
FAQs About Easy Graveyard Brownies
Q1. Can I use boxed brownie mix for this recipe?
Absolutely! A boxed mix keeps things simple and consistent, especially when decorating with kids.
Q2. Can I make these brownies ahead of time?
Yes. Bake and cool them a day before, then frost and decorate the day of serving.
Q3. How long do Graveyard Brownies last?
They stay fresh in the refrigerator for up to 3 days or can be frozen (undecorated) for up to a month.
Q4. Can I make them gluten-free or dairy-free?
Definitely. Use a gluten-free brownie mix and dairy-free frosting — most Halloween candies are already dairy-free!
Q5. How can I make these look more professional?
Clean edges, uniform tombstones, and a neat frosting base make all the difference. Use piping bags or offset spatulas for precision.
Conclusion: Scary-Good, Spooky, and Sweet
Halloween desserts should be equal parts fun and delicious — and these Easy Graveyard Brownies check both boxes. They’re rich, chocolatey, and endlessly customizable, making them a hit for both kids and adults alike.
Whether you’re whipping them up for a neighborhood bash, a classroom party, or just a cozy night in, you’ll love how simple they are to make and how impressive they look.
So go ahead — gather your ingredients, put on your favorite spooky playlist, and start baking. Because nothing says “Happy Halloween” quite like a tray of edible graveyards!
Call-to-Action:
If you loved this recipe, share it with your fellow Halloween enthusiasts!
Tag your creations on social media with #GraveyardBrownies or #SpookyBakes — and show off your most creative edible tombstones.
You might just inspire someone else to start their own deliciously spooky tradition.