A Sweetly Spooky Tradition to Share
Halloween isn’t just about costumes and candy; it’s about memories — sticky fingers from caramel apples, laughter while carving pumpkins, and that thrill of spooky fun that never gets old.
If you’re looking for a dessert that captures all that excitement without requiring hours in the kitchen, these Easy Halloween Dirt Cups are your answer. They’re sweet, simple, and full of personality — the kind of treat your kids will remember long after the candy wrappers are gone.
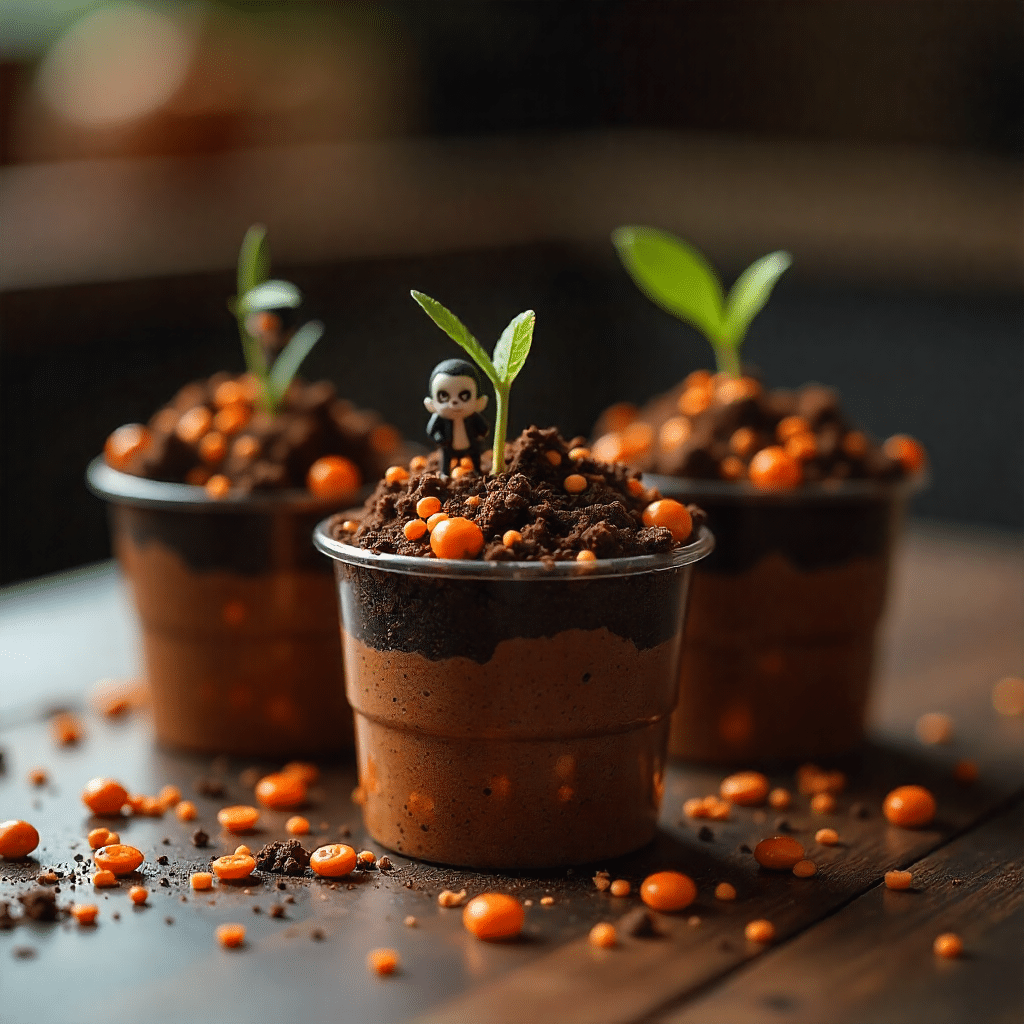
This no-bake dessert brings together creamy chocolate pudding, crunchy cookie “dirt,” and playful toppings like gummy worms or candy pumpkins. It’s just spooky enough to be fun but still friendly for school events, classroom parties, or family movie nights.
The best part? You can make them in 15 minutes, and everyone can decorate their own.
Why You’ll Love These Easy Halloween Dirt Cups
These aren’t just desserts — they’re little cups of Halloween joy. Whether you’re a parent juggling party prep or a teacher organizing a classroom celebration, these dirt cups are an easy win.
Here’s why you’ll love them:
- Quick and easy: Ready in under 20 minutes, no baking needed.
- Kid-approved: Fun to make, decorate, and eat.
- Budget-friendly: Uses affordable, easy-to-find ingredients.
- Delicious layers: Smooth chocolate pudding meets crunchy cookies.
- Versatile: Customize with spooky toppings — worms, ghosts, tombstones, pumpkins — whatever your imagination dreams up.
These Halloween Dirt Cups are perfect for last-minute dessert ideas that still look like you planned ahead.
Ingredients for Easy Halloween Dirt Cups
To make the best Halloween Dirt Cups, you’ll only need a few pantry staples and a sprinkle of creativity.
Ingredient Table
| Category | Ingredients | Quantity |
|---|---|---|
| Pudding Base | Instant chocolate pudding mix | 1 (3.9 oz) box |
| Cold milk | 2 cups | |
| Whipped topping (Cool Whip or similar) | 1 cup | |
| Cookie “Dirt” Layer | Chocolate sandwich cookies (like Oreos) | 15–20 cookies, crushed |
| Decorations | Gummy worms | As desired |
| Candy pumpkins or ghosts | Optional | |
| Candy corn or sprinkles | Optional | |
| Serving | Clear plastic cups, mini mason jars, or dessert cups | 6–8 small servings |
Tip: For a richer version, use homemade chocolate pudding or layer chocolate mousse instead of instant pudding.
How to Make Halloween Dirt Cups (Step-by-Step Guide)
This is one of the simplest and most satisfying recipes you’ll ever make. It’s so foolproof that your kids can help from start to finish.
Step 1: Mix the Chocolate Pudding (H3)
- In a large bowl, whisk together the chocolate pudding mix and cold milk for about 2 minutes until smooth and thick.
- Fold in the whipped topping gently to make the texture lighter and creamier.
- Let it chill in the refrigerator while you crush the cookies.
You can use sugar-free pudding mix if you prefer a lighter option.
Step 2: Crush the “Dirt” (H3)
- Place chocolate cookies in a zip-top bag.
- Crush them using a rolling pin or pulse them in a food processor until they resemble coarse crumbs.
- Save a few bigger chunks for texture and decoration.
This is the perfect job for little helpers — kids love smashing cookies!
Step 3: Layer the Cups (H3)
- Spoon about 2 tablespoons of crushed cookies into the bottom of each cup.
- Add a layer of chocolate pudding mixture.
- Continue layering pudding and cookie crumbs until you reach the top.
- Finish with a generous sprinkle of cookie “dirt.”
Pro Tip: Use clear cups so everyone can see those spooky, chocolatey layers!
Step 4: Decorate Your Dirt Cups (H3)
Now comes the fun part — decorating! This is where you can get as creative or spooky as you like.
Here are some ideas:
- Creepy-Crawly Cups: Add gummy worms crawling out of the dirt.
- Graveyard Cups: Stick a cookie or graham cracker “tombstone” in the top and write “RIP” with icing.
- Pumpkin Patch Cups: Place candy pumpkins and green frosting “vines” on top.
- Ghostly Cups: Add whipped cream ghosts or white chocolate eyeballs.
Kids can make their own designs — it’s a fun Halloween activity and dessert rolled into one.
Fun Decoration Ideas for Halloween Dirt Cups
Want to take your dessert table to the next level? Try these creative twists that will make your Halloween Dirt Cups the talk of the party.
Creative Toppings (H3)
- Candy Bones: Use white chocolate pretzels or candy bones to make a skeleton scene.
- Monster Eyes: Add candy eyeballs for a fun, spooky surprise.
- Spiderweb Topper: Drizzle melted white chocolate in a spiral and drag a toothpick from center to edges for a web design.
- Witch’s Brew Cups: Tint pudding green with food coloring and top with crushed chocolate cookies.
Presentation Tips (H3)
- Serve in mini mason jars or plastic dessert cups with Halloween stickers.
- Add spooky name tags for each kid.
- Use orange and black spoons for a festive touch.
- Display cups on a Halloween-themed tray with cobweb decorations or LED tea lights.
Small details make these dirt cups feel like a themed centerpiece — not just dessert.
Make-Ahead and Storage Tips
You’ll love how low-maintenance this dessert is. It’s make-ahead friendly, party-approved, and fridge-stable.
- Make-Ahead: Prepare pudding and cookie layers up to 24 hours in advance. Add decorations just before serving.
- Refrigerate: Store in the fridge for up to 3 days in covered cups or airtight containers.
- Avoid Sogginess: Add cookie “dirt” right before serving to keep the crunch.
- Freezing: Not recommended — pudding texture can separate once thawed.
If you’re bringing these to a classroom party, store them in disposable cups with lids for easy transport.
Nutritional Information (Per Serving)
| Nutrient | Approximate Amount |
|---|---|
| Calories | 280 kcal |
| Protein | 3 g |
| Carbohydrates | 38 g |
| Fat | 12 g |
| Sugar | 27 g |
Note: Nutritional values may vary depending on the ingredients and toppings you use.
Expert Tips for Perfect Halloween Dirt Cups
Here are a few simple ways to make your Halloween Dirt Cups look (and taste) amazing every single time:
- Chill before serving: It helps the pudding set and layers hold their shape.
- Add texture: Use cookie chunks instead of just crumbs for variety.
- Flavor twist: Mix in a few drops of peppermint or orange extract for something different.
- Get the kids involved: Let them handle decorating — it’s a great way to make memories.
- Layer smartly: Start and end with cookie crumbs for that real “dirt” illusion.
Remember — the goal isn’t perfection; it’s fun, laughter, and deliciously spooky messes.
Delicious Variations to Try
Once you’ve mastered the classic version, try giving your Easy Halloween Dirt Cups a creative twist!
Flavor Twists (H3)
- Peanut Butter Lovers: Add a thin layer of peanut butter or crushed peanut butter cups.
- Mint Chocolate: Use mint Oreos and add a few drops of mint extract to the pudding.
- Pumpkin Spice Version: Mix a spoonful of pumpkin puree into the pudding for a seasonal flavor.
- Cookies & Cream Style: Swap chocolate pudding for vanilla and layer with crushed Oreos.
Vegan or Allergy-Friendly Options (H3)
- Use plant-based pudding mix and almond milk.
- Replace whipped topping with coconut whipped cream.
- Choose dairy-free chocolate sandwich cookies.
🕸️ You can make this recipe fit nearly any dietary preference without losing the fun or flavor.
FAQs About Easy Halloween Dirt Cups
Q1. Can I make Halloween Dirt Cups ahead of time?
Yes! Assemble the pudding and cookie layers up to one day in advance, but add the decorations right before serving so they stay fresh and crisp.
Q2. Can I make this dessert dairy-free?
Definitely. Use almond, soy, or oat milk for the pudding, and top with coconut whipped cream for a vegan-friendly version.
Q3. How long do Halloween Dirt Cups last in the fridge?
They’ll stay delicious for up to 3 days when stored in an airtight container.
Q4. What can I use instead of Oreos?
You can use any chocolate cookie or graham cracker crumbs for the “dirt.” Even chocolate granola works if you want a healthier twist.
Q5. Can kids make this on their own?
Absolutely! This recipe is a perfect family activity. Young children can crush cookies, layer pudding, and decorate their own cups safely and creatively.
Conclusion: Sweet, Spooky, and Unforgettable
Halloween desserts don’t have to be complicated to be memorable. These Easy Halloween Dirt Cups are proof that a few simple ingredients can create a treat that’s festive, tasty, and full of laughter.
From the crunchy cookie dirt to the wiggly gummy worms, every bite is a playful mix of textures and flavors that feels just like Halloween should — fun, creative, and just a little mischievous.
So whether you’re planning a classroom party, hosting a neighborhood get-together, or simply looking for a fun weekend activity with your kids, this recipe fits right in.
Grab your pudding mix, crush some cookies, and let your imagination run wild — because Halloween should always be sweet, spooky, and unforgettable.
Call-to-Action:
If you enjoyed making these Easy Halloween Dirt Cups, share your creations on social media and tag #SpookySnackTime or #EasyHalloweenTreats — because nothing spreads Halloween cheer like a little chocolate “dirt” and a lot of smiles.